Create Windows Monitoring Account
Create Windows Monitoring Account
This document describes how to create a local Windows account on a target machine for monitoring. For official details on WMI access and security, refer to the Microsoft WMI Documentation.
To monitor a Windows host via WMI, you must configure a user account on the target machine with appropriate permissions. Follow these steps to set up the account.
1. Create the Local Account
First, create a new local user account on the target host. For this guide, we will use the username zpmon:
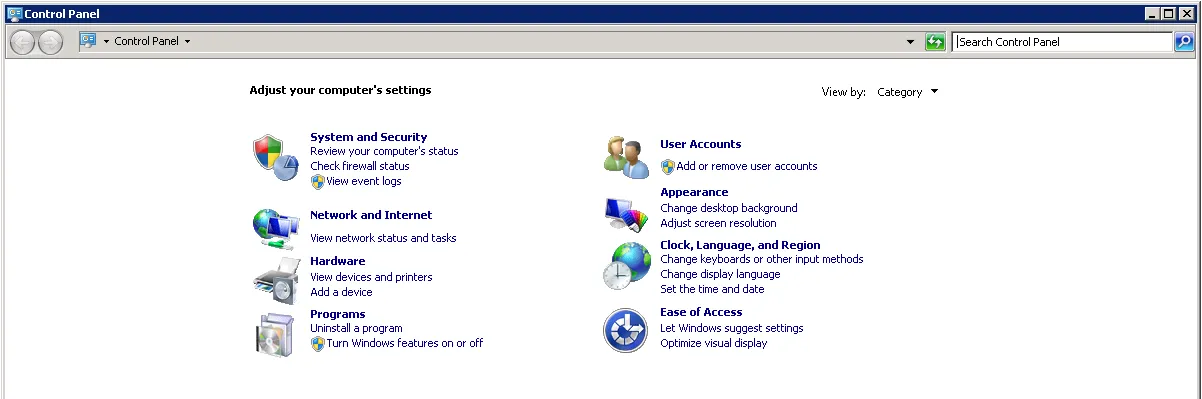
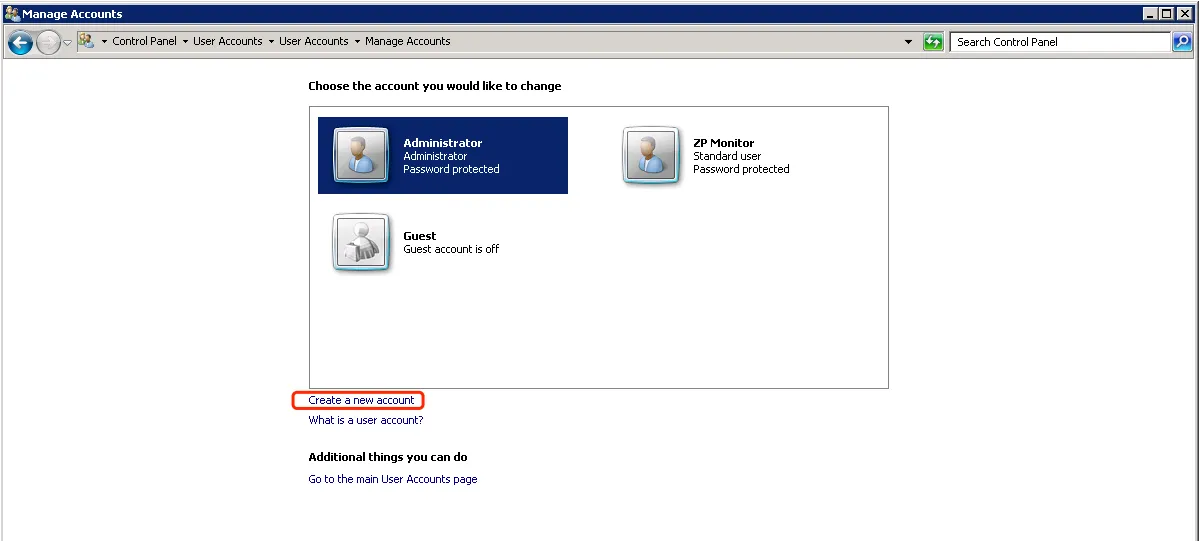
- Navigate to Control Panel > User Accounts > Manage Accounts.
- Select Add a user account to create a local user:
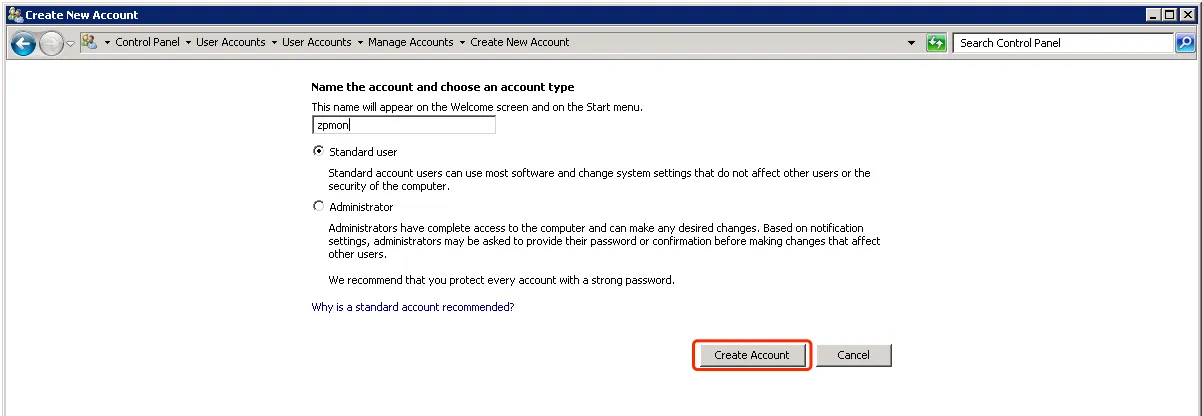
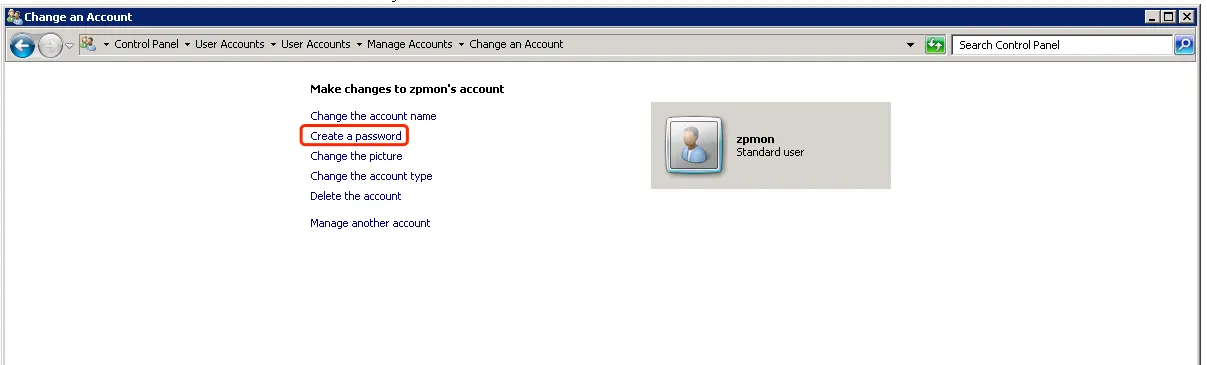
After creating the account, set a secure password for it. You will need these credentials when configuring the WMI monitoring service in ZoomPhant.
2. Add the Account to Local Groups
The monitoring user must be added to the following local groups:
- Distributed COM Users
- Performance Log Users
- Performance Monitor Users
- Remote Management Users
Note: Depending on your Windows version, some of these groups might not exist. Add the user to all applicable groups that are available.
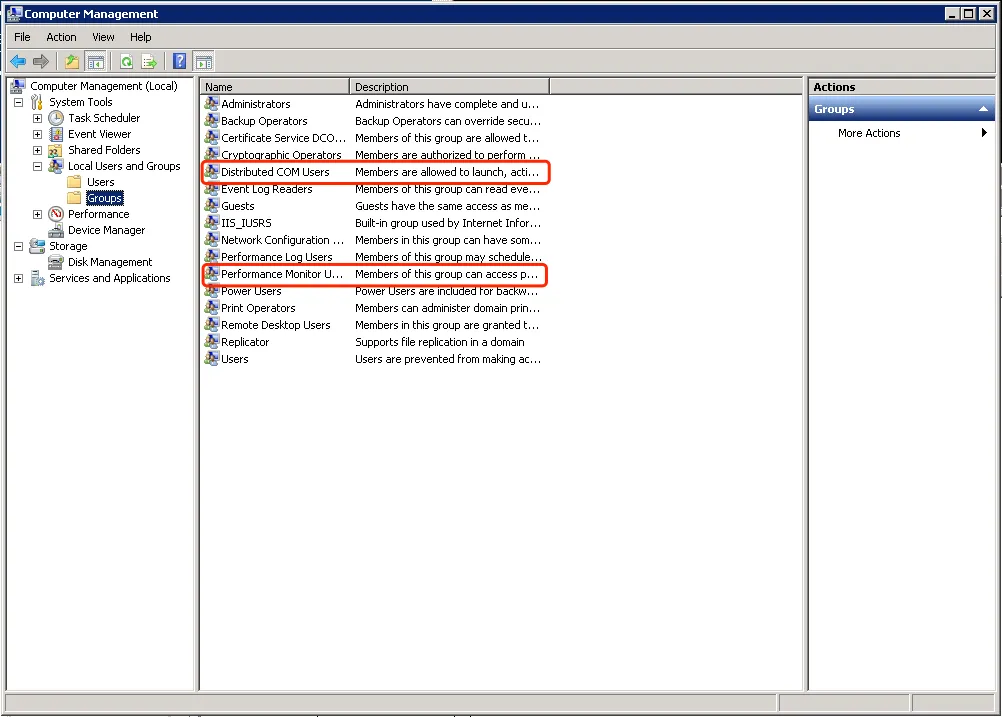
To assign these groups, open Computer Management (compmgmt.msc) and navigate to System Tools > Local Users and Groups > Groups. Select each group, add the zpmon user, and apply the changes:
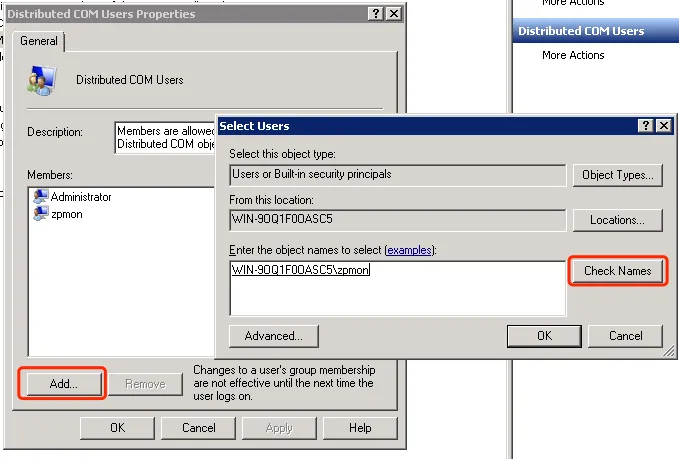
Double-click each group to open its properties, click Add…, and enter the user name:
3. Grant Permissions
You must configure permissions in several system settings to enable WMI access.
WMI Namespace Permissions
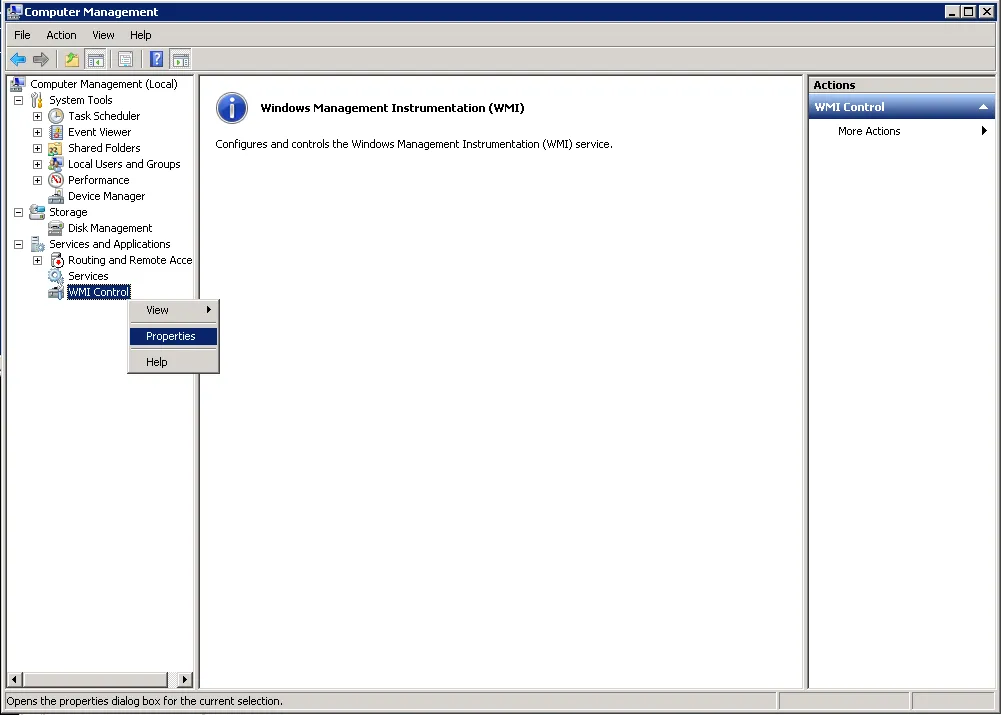
In Computer Management, expand Services and Applications, right-click WMI Control, and select Properties:
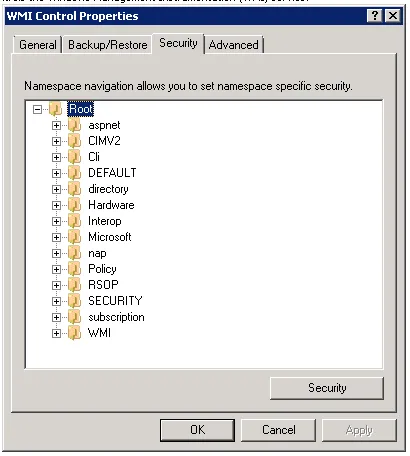
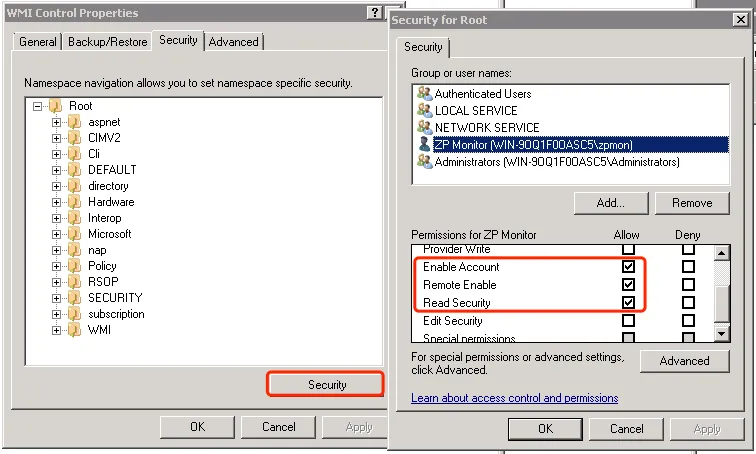
Switch to the Security tab, select the root namespace, and click the Security button at the bottom:
Add the zpmon user and enable the following permissions:
- Execute Methods
- Enable Account
- Remote Enable
- Read Security
DCOM Configuration
WMI uses DCOM (Distributed Component Object Model) for remote queries. You must configure DCOM permissions to allow remote connections. Open the Component Services manager by running dcomcnfg from the Start menu.
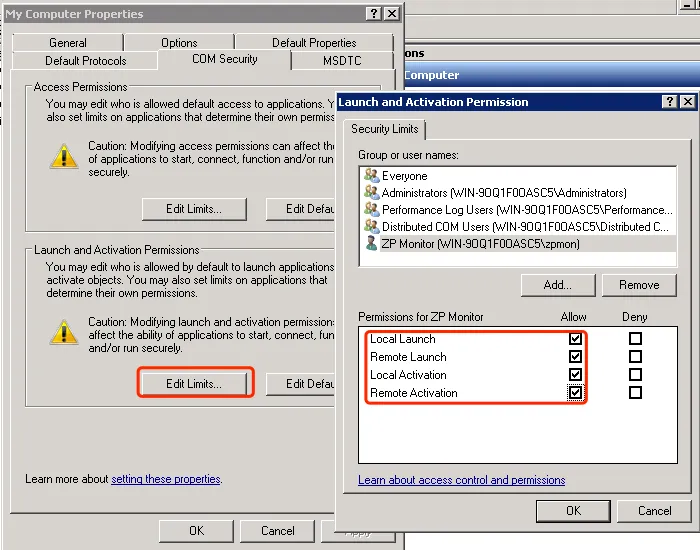
Navigate to Component Services > Computers > My Computer. Right-click My Computer, select Properties, and switch to the COM Security tab. Click Edit Limits… under Launch and Activation Permissions and allow Remote Launch and Remote Activation for the user (or a group containing the user):
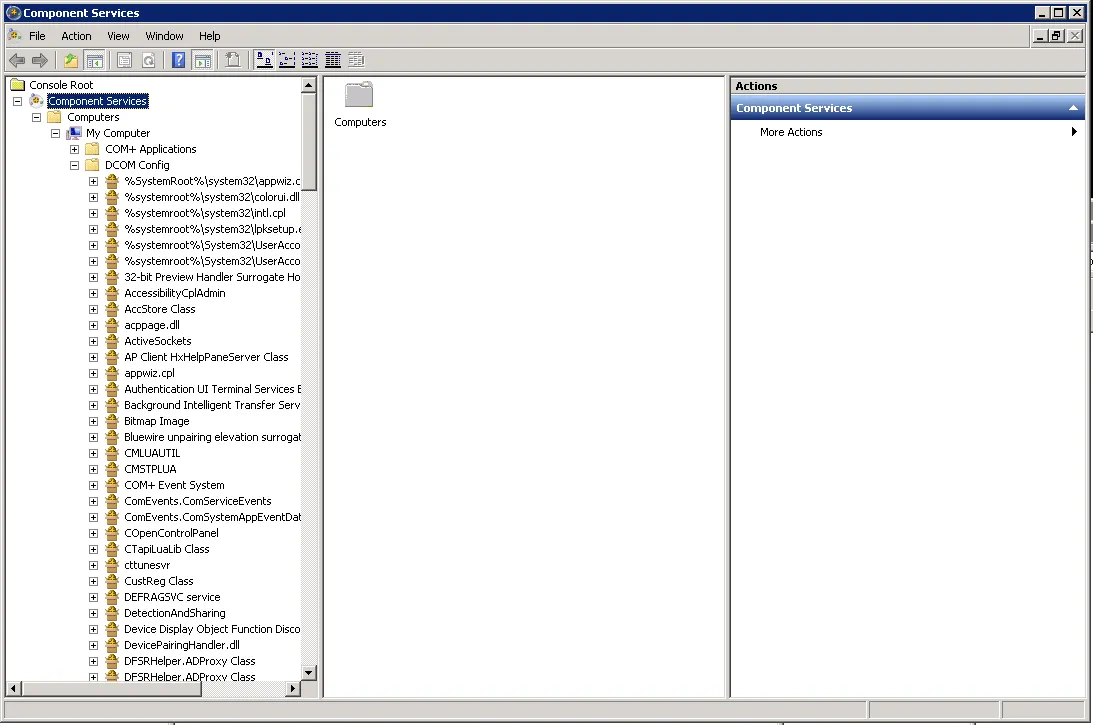
Next, expand DCOM Config under My Computer, locate Windows Management and Instrumentation, right-click it, and select Properties:
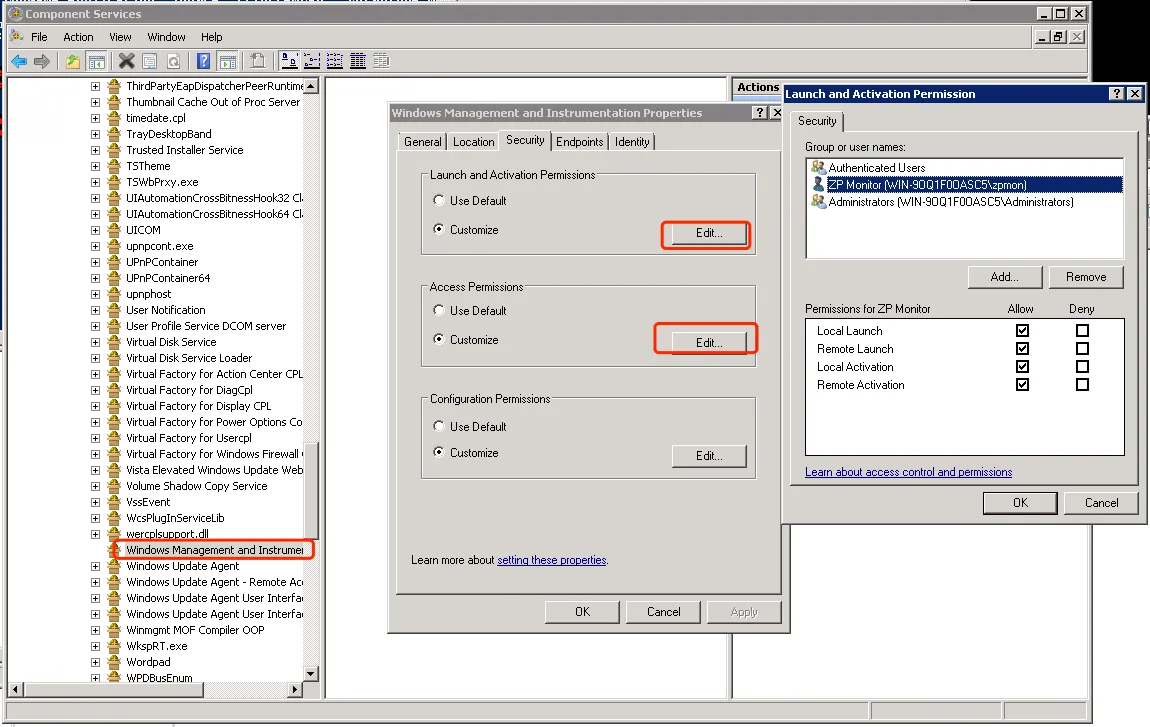
On the Security tab, ensure you customize both Launch and Activation Permissions and Access Permissions to grant the monitoring user remote access rights:
4. Firewall Settings
Ensure that the Windows Firewall is configured to allow WMI and DCOM traffic. You must enable the following inbound rules:
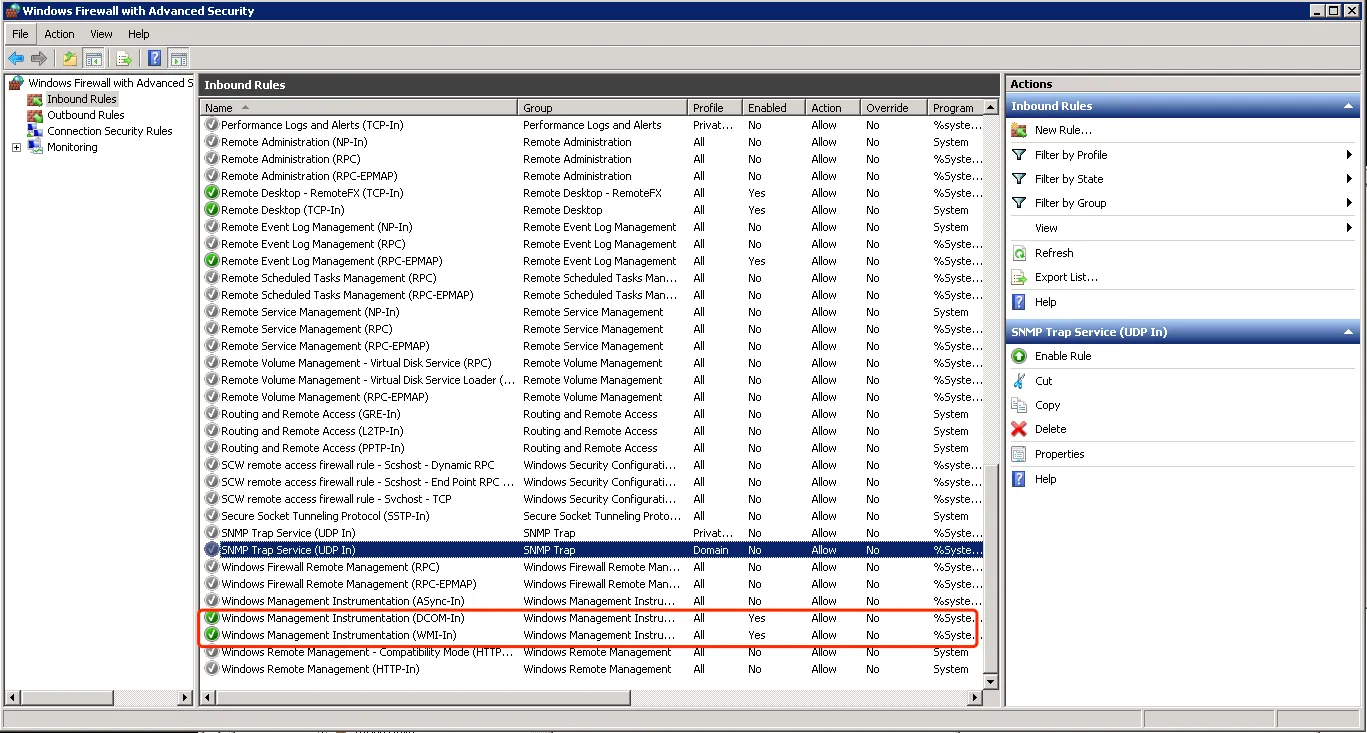
For troubleshooting, you can test connectivity from the collector using utility tools such as wbemtest or wmic to verify that the credentials and permissions are configured correctly.